How to Get a Passport for Your Baby in the United States – Step by Step!
Getting a baby a passport can seem daunting with making sure you have all of the right appointments and paperwork, but it was actually way more simple than I expected! From the moment that Kenny and I found out that we were pregnant, I have been SO excited to travel as a family of three! Travel is very much engrained in our lifestyle, so making sure that our sweet baby boy Harrison is set up to travel with us early on was one of the first things on our to-do list after he was born. Getting his passport was Harrison’s first big travel milestone, and now he’s ready to jet-set with us whenever we feel ready for his first international trip (here are some of the places that we are considering!!).
Passports for children under the age of 16 are valid for five years, so even if you don’t have an international trip on the calendar just yet, it’s still a good idea to apply for one sooner rather than later just to be prepared. So, if you’re looking to get a passport for your infant or child, here are the step-by-step instructions!
How to Get Your Baby’s First U.S. Passport for International Travel
1. Get your baby’s official birth certificate and social security number.
Since you will need your baby’s birth certificate and social security number in order to apply for a passport, you will have to wait to fill out any forms until he or she is born. Right after you give birth, you may receive a certificate from the hospital. However, the version that you will need to submit for your baby’s passport is the certified birth certificate (which is issued by your city, county, or state depending on where you live). Once you receive the official birth certificate, make sure that both parents’ names are printed correctly since it will be used as proof of parental identity. Usually, you’ll receive the official birth certificate one to two weeks after giving birth.
2. Make your passport appointment.
To get a passport for your child, you will have to schedule an in-person appointment with both parents/guardians present (you can find a passport acceptance facility in your area with this locator). I highly recommend making this appointment as soon as you have the birth certificate and social security number just in case there is a wait!! While you wait for your appointment date, start preparing all of the forms and materials you need to bring with you.
JETSET TIP: If both parents/guardians cannot be at the appointment (or if you’re a single parent), you can find more information about what to do listed in step 7 here.
3. Fill out Form DS-11, but don’t sign it.
This government form is your official application form for your baby’s passport. You’ll need your baby’s social security number to complete the form, along with the basics like date of birth, place of birth, gender, and contact info for both of the parents. You can find the form filler or PDF version of Form DS-11 in step 1 here. Make sure you don’t sign the forms ahead of time — you’ll need to sign these forms in person during your passport appointment!
4. Make photocopies of your baby’s birth certificate.
When you submit your application, you’ll need to send both the original copy of your baby’s official birth certificate (don’t worry, they’ll mail it right back to you!) along with a photocopy of it. Be sure to print this photocopy in black and white on 8.5″ x 11” paper to avoid any issues.
5. Make photocopies of both parents’ IDs.
In addition to providing proof that you are your baby’s parents (which their birth certificate will cover), both parents will need to submit their own IDs. Your passports or driver’s licenses will work for this, or you can find a full list of acceptable forms of ID here. You’ll need to bring your passport/license to your appointment, along with photocopies for each of you. For the copies, again, make sure they’re on white 8.5″ x 11” paper (and not double-sided). If you’ve adopted your baby, you’ll need to bring your adoption decree and copies of it as well.
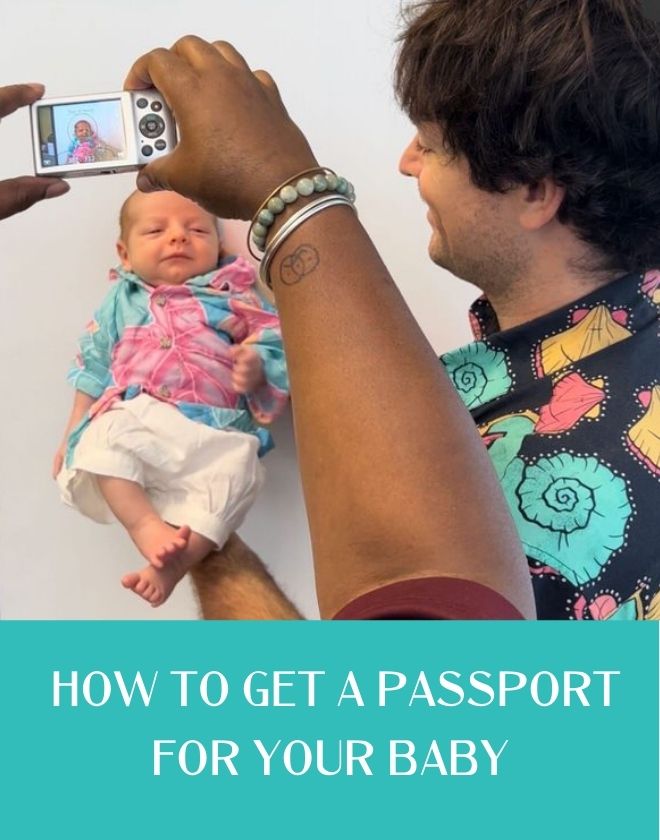
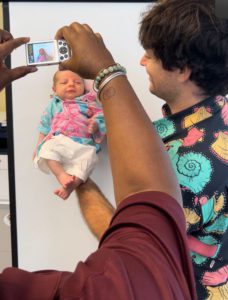
6. Get a passport photo of your baby.
This was the most fun (and tricky) part of the process! As you can imagine, it’s hard to get a good passport photo of a newborn. Thankfully, there’s a little more leeway with baby passport photos since it’s hard to get a photo of them with eyes fully open and looking at the camera. We did ours in person, which I found easiest, but I’ve seen others recommend laying a white sheet down and taking a photo of them laying on their back. You can find all of the requirements for passport photos here. If you DIY your photo, have it printed in the standard 2″ x 2″ size, and be sure not to staple it to the forms ahead of time (they’ll staple it in person when your application is accepted).
7. Attend your passport application appointment as a family to submit your application.
Again, providing parental consent is so much easier (and avoids so many extra forms) if both parents attend the application appointment in person. It’s also such a special milestone to do together as a family! At this appointment, they’ll review your forms and materials to ensure that you have everything you need. They will also check the photo to make sure it is a photo of your baby. Then, you’ll sign the Form DS-11 in front of them, they’ll staple your baby’s photo to the application, and you’ll pay the fee to officially submit it! It’s $100 for the passport itself and $35 for the processing fee. Now, you’re officially on your way to traveling as a family!
8. Wait for your passport to arrive.
After your application is submitted at your appointment, all you have to do is wait to receive your baby’s passport (and the returned original birth certificate) in the mail. You can track your baby’s passport application with the government passport application tracker. It typically takes about four to six weeks for the application to be processed, though there have been delays the past couple of years due to covid, so I recommend applying as early as possible so you’re not scrambling before a trip! We got our baby’s in the mail in just under a month!
9. Enjoy exploring the world as a family!
I can’t even tell you how excited I am for all of the trips to come with Harrison and to see the world through his eyes as he experiences new places for the first time! You know I’ll keep you updated along the way, so be sure to check back regularly for updates (and let me know if there is anywhere in particular that you want the inside scoop on!).