
Christina’s Heavenly Homemade Caramels (No Corn Syrup Needed!)
Happy holidays, everyone!!!
One of my absolute favorite things to gift this time of year is my homemade salted caramels. They’re the little luxe treat that everyone goes crazy for — friends, teachers, family, employees… and in our house, Kenny and the kids devour them so fast I have to double the batch or there wouldn’t be any left to gift.
They’re silky, rich, melt-in-your-mouth perfect, and once you understand the rhythm of the recipe, they’re surprisingly simple to make.
There are a LOT of caramel recipes out there, and they’re all a little different from one another. I made mine up tweaking and trial-and-error-ing a few different recipes, and this one is about getting the delicious soft caramel candy heavenly taste with no corn syrup necessary, and no evaporated milk, either. Just good old fashioned real ingredients!!
I love to bake, but I also love to feel good about what I’m feeding my family. Using whole, fresh ingredients vs. processed foods makes such a difference in the flavor, the texture, and honestly, the joy of making something from scratch. These caramels taste like heaven, and they’re as wholesome as caramel can get.
NOTE: Candy making is very exact, and fickle! Using a little corn syrup does help these keep longer and makes the recipe more fool-proof. If you’re gifting for friends or baking for a crowd, you use a little corn syrup for insurance (details below)
Tools You’ll Need
There are a few tools that you definitely need to ensure these caramels turn out perfectly. Candy-making is no joke!!!
A candy thermometer is a MUST (I love this Taylor one)
Parchment paper to line pan (not wax paper)
Two saucepans (one at least 2 quart, the other at least 4 quart) Do not use a smaller pan! It may seem like you don’t need a pan that big, but trust me! The caramel triples in size at one point in this recipe, and it could be a huge mess.
Spatula
Whisk
Wax paper (optional, to wrap caramels afterwards!)
Ingredients
1 cup Heavy Cream
4 Tbsp. Unsalted Butter (I’ve used salted, it turns out fine too)
2 tsp. Sea Salt, plus more for sprinkling (I always use this Maldon sea salt)
1 1/4 cup White Granulated Sugar
1/2 cup High quality maple syrup
OPTION: If you prefer a smoother, more beginner-friendly caramel, replace part of the maple syrup with corn syrup (corn syrup adds structure, and makes the recipe more beginner-friendly):
-
1½ cups white granulated sugar
-
¼ cup light corn syrup + ¼ cup maple syrup
1/4 cup Water
1/2 tsp. Vanilla Extract (I love and ALWAYS use this brand of vanilla)
Note: 1.5X this recipe if using a 9×13 pan, or keep it as is if using an 8×8 square pan.

Christina's Homemade Caramels
The ultimate homemade salted caramel recipe- soft, buttery, silky caramels with flaky sea salt on top. This easy stovetop caramel recipe is perfect for gifting, holidays, or dessert boards. Silky-smooth, rich, and delicious! Plus, no corn syrup in this recipe! A festive holiday favorite!
Ingredients
- 1 cup Heavy Cream
- 4 Tbsp. Unsalted Butter
- 2 tsp. Sea Salt, plus more for sprinkling (I always use this Maldon sea salt)
- 1 1/4 cup White Granulated Sugar (or if using corn syrup, 1 1/2 cups)
- 1/2 cup High quality maple syrup (or 1/4 cup corn syrup -corn syrup is more forgiving for beginners)
- 1/4 cup Water
- 1/2 tsp. High quality Vanilla Extract
Instructions
1. Prep your caramel mold
Line an 8×8-inch baking dish with parchment paper, creasing the corners and leaving flaps hanging over the sides so you can lift the caramel out easily later.
2. Melt the butter into the cream
In a medium saucepan over medium heat, warm the heavy cream, butter, and salt until everything melts together. Once melted, remove from heat and set aside.
3. Start the sugar syrup
In a large, heavy 4-quart saucepan, stir together the sugar, maple syrup, and water until it becomes a thick, grainy paste.
Attach a candy thermometer, making sure the tip is submerged but not touching the bottom.
From this moment on, do not stir!
4. Cook the sugar to 240°F–325°F
Place the pot over medium to medium-high heat and let the sugar mixture come to a boil—no stirring!
At around 250°F, the syrup turns a little more transparent.
Around 320°F, it deepens into a beautiful amber color.
Do not go over 325°F — that’s the line between delish caramel and burnt sticky candy!!
5. Whisk in the cream mixture
Turn off the heat.
Slowly pour in the warm cream/butter mixture WHILE whisking. The caramel will bubble up dramatically (like triple in height), so pour carefully.
Once fully incorporated, stop whisking and return the pot to medium heat.
6. Heat to 240°F–245°F
Let the caramel boil and watch it carefully without touching, until it reaches 240–245°F.
It starts as buttery yellow, then transforms into rich golden caramel.
Remove from heat.
7. Add the vanilla
Quickly whisk in the vanilla extract.
8. Pour the caramel
Immediately pour the caramel into your prepared pan.
Do not scrape the bottom of the pot—sometimes there are burnt sugar bits you don’t want in your perfect candies.
Tap the pan a few times on the counter to release air bubbles.
If topping with flaky salt, wait 3–4 minutes so it sticks without sinking. But not too long that it won't stick.
9. Let it set
Let the caramel rest at room temperature for at least 2 hours, though overnight gives the cleanest cuts. Once fully cool, cover lightly.
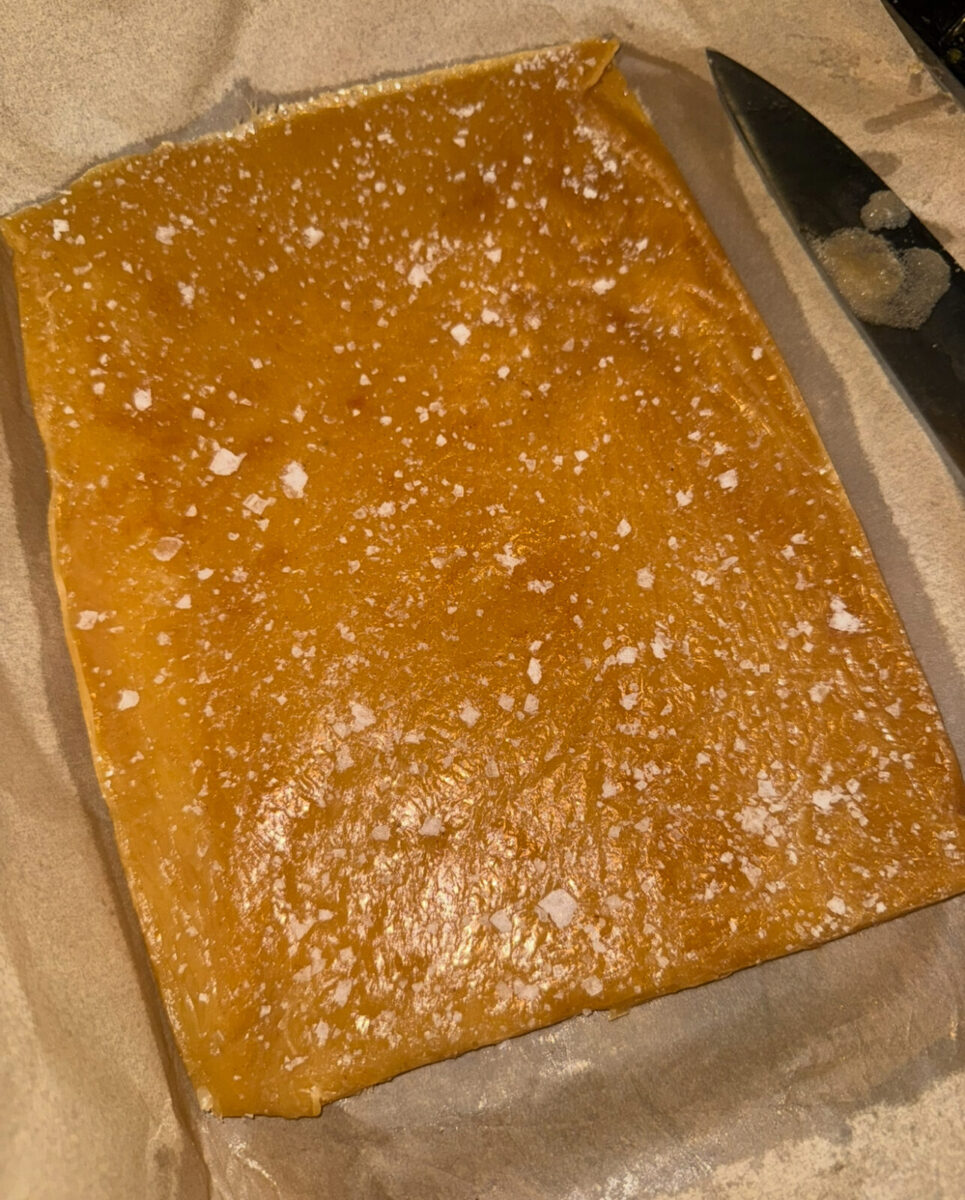
10. Cut the caramels
Lift the caramel slab out using the parchment.
Place it on a cutting board while still on the parchment—otherwise it sticks aggressively.
Use a sharp knife to cut into squares or rectangles.
Avoid regular mini cupcake papers—they cling.
Use parchment-style papers instead, or skip straight to wrapping…
11. Wrap them up
Cut wax paper into small rectangles, wrap each caramel individually, and twist the ends.
Your salted caramels will keep beautifully at room temperature for up to 2 weeks—though good luck not eating them all by then!
Notes
Jetset Tips for Perfect Caramels
✨ Don’t stir once the sugar starts boiling. Stirring causes crystallization (grainy caramels).
✨ Use a reliable candy thermometer!
✨ Prep everything first. Caramel moves fast, and you want to be ready.
✨ The color tells you everything. Deep gold, not dark brown.
✨ Use quality salt. Maldon salt on top makes these next-level. Wait a few minutes before sprinkling.
Note: 1.5X this recipe if using a 9x13 pan, or keep it as is if using an 8x8 square pan.
Recommended Products
As a member of affiliate programs, I earn a small commission off of purchases from my links that help me continue to run this blog.


