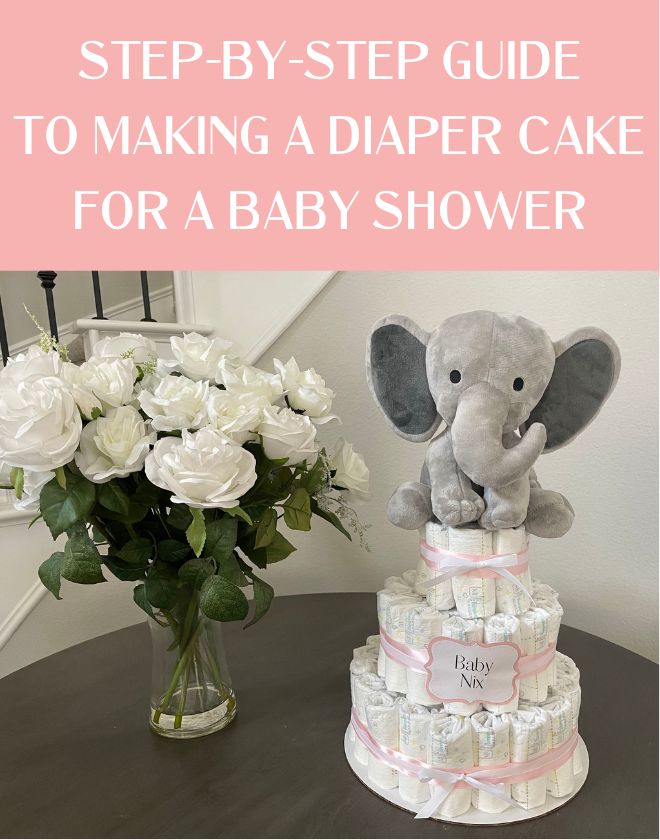
How to Make a Diaper Cake for a Baby Shower
If you are planning a baby shower for a special lady in your life, you have to make her a diaper cake! Not only is this such a cute addition to the shower itself, but it is also a very useful gift for the mama-to-be as she will need a lot of diapers! Making a diaper cake for the very first time can be a little intimidating. Lucky for you, I have been there, done that, and now I have created a step-by-step guide for how to make a diaper cake (you’re welcome 😉)!
Send me photos (or tag me) on Instagram when you complete your very own diaper cake! I can’t wait to see them!!
Items You Need to Make a Diaper Cake
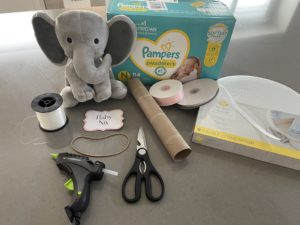
Here are all of the items that you need to make a diaper cake for a baby shower! All of these items are from Amazon, but you can find them just about anywhere. You may have some of them in your house already, too!
- Newborn diapers (I recommend an 84-pack)
- White cake circle (12 inches in diameter – you could also cut out a piece of cardboard for this and wrap it with fabric or wrapping paper!)
- Clear fishing line
- Pink or blue one-inch ribbon
- White 3/8″ ribbon
- Empty paper towel roll (this is what I used!), bottle of wine, baby lotion, or other similarly-shaped product
- Scissors
- Hot glue gun
- Stuffed animal of your choice (I looooove this little elephant!)
- Optional: Personalized tag (I made mine on Canva)
- Optional: If you don’t have another person to help you hold the diapers in place, I recommend getting these larger rubber bands! Trust me, they will come in handy!
Step-by-Step Guide to Making a Diaper Cake
Step One: Heat up your hot glue gun. Make sure that your glue gun is placed on a safe surface where kiddos won’t be able to grab it!
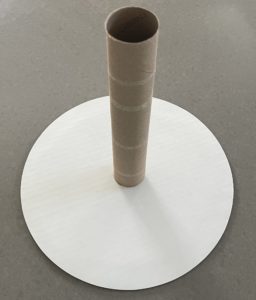
Step Two: Take your cake circle and measure to the center. You can do this by measuring the diameter and marking halfway in multiple spots until you figure out where the middle is (you can also just eyeball it — it doesn’t have to be perfect!). These cake circles already have the middle marked, which is super convenient!

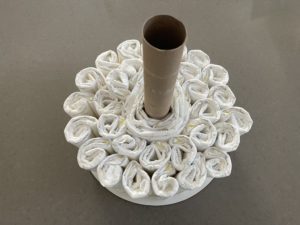
Step Three: Grab your empty paper towel roll, wine bottle, baby lotion, or other similarly-shaped product and hot glue it to the center of the cake circle. If you are using a bottle of wine, I would recommend doubling or tripling up on the cake circles (just hot glue them together).
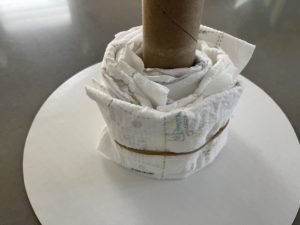
Step Four: Once your “center” is secured to the cake circle, open up your box of diapers and grab 4 – 6 of them, unrolled. Wrap these around the centerpiece until you have a “base layer” that comes out to the middle of the cake circle.
Step Five: Use a rubber band (or a friend/partner’s hands!) to hold the unrolled diapers in place.
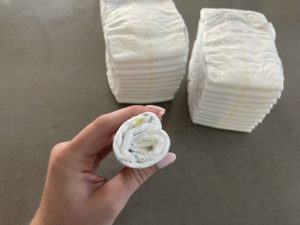
Step Six: Individually roll diapers and fit them around the outside of the unrolled diapers. You can either stretch the rubber band or have your helper just extend their hands. I will say, this is honestly easier with a rubber band in my opinion, so even if someone is helping you, I would put one of those bad boys on just in case!
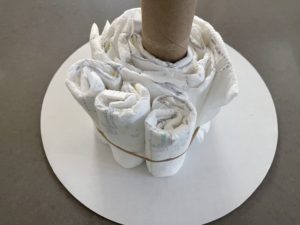
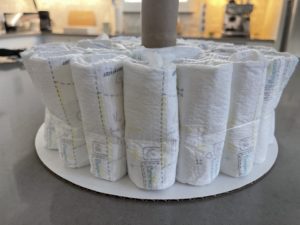
Step Seven: Repeat step six until you have two full layers of rolled diapers (this should reach the outside of the cake circle).
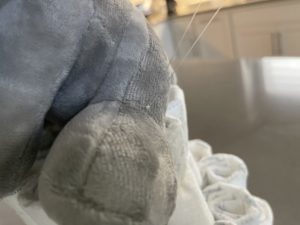
Step Eight: Take your fishing line and wrap the diapers 3 – 4 times and pull until they are snug. Be careful not to wrap the fishing line around the rubber band, otherwise, it’s difficult to get the rubber band off. Tie the fishing line in a knot several times to ensure that it does not slip. Remove the rubber band.
Step Nine: Repeat steps four through eight to make the second layer of your cake. This time, repeat in smaller quantities so that the second layer of cake is not as big as the first.
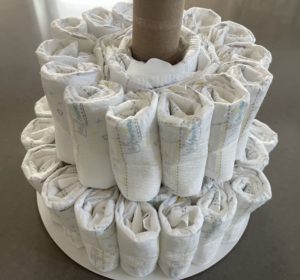
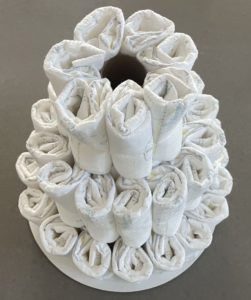
Step Ten: Repeat steps six through eight for the top tier. I do not recommend any unrolled diapers on this tier since it is so small. For this final tier, it is definitely easiest to have someone help you hold the diapers in place until you are ready for the fishing line.
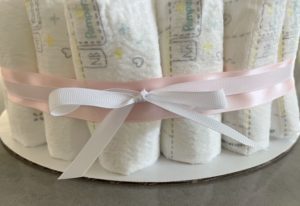
Step Eleven: Measure and cut the colored one-inch ribbon to the size of the bottom tier and hot glue it to itself (very important not to get any glue on the diapers so that they are still usable!).


Step Twelve: Repeat step eleven for the middle tier. Try to make the ribbon overlap in the same spot on the back of the cake so that you cannot see the seams from the front.
Note: You do not want to attach any ribbons to the top tier just yet. This comes later after the stuffed animal is attached to the top of the cake!
Step Thirteen: Tie your white 3/8-inch ribbon in a bow over the colored ribbon on the bottom tier. Hot glue the white ribbon to the colored ribbon in a few places so that it stays secure.
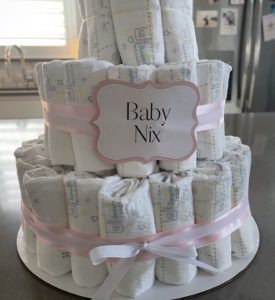
Step Fourteen: Measure, cut, and glue the white ribbon to the colored ribbon on the middle tier. If you are planning to place a personalized tag on this layer, do not tie a bow — just hot glue the white ribbon flat to the colored ribbon.
Step Fifteen: If desired, hot glue a personalized tag to the middle tier’s ribbons.
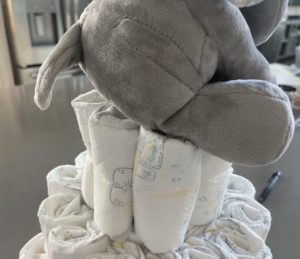
Step Sixteen: Place your stuffed animal on the top of the cake and attached it with the fishing line. The easiest way to do this is to loop the fishing line between the diapers and fishing line on the top tier, then wrap the line around the stuffed animal’s legs and knot it tightly.
Step Seventeen: Glue the colored ribbon to the top tier, then tie the white ribbon in a bow and secure it to the colored ribbon in a few places with hot glue.
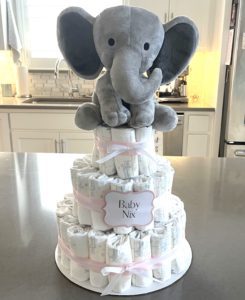
And there you have it — a beautiful, easy, and useful gift for the mama-to-be in your life! This looks great either on a cake stand or sitting on the table at a baby shower. And don’t forget to give mama any leftover diapers that you didn’t use while making the cake!